Nobody likes to wait. But it's a necessary evil of life. Perhaps the time spent in a surgical waiting room is the worst.
It actually wasn't that bad for me while Beloved was having his knee replacement surgery. Yes, I will admit that I was a little nervous, and I had shed a few tears before that day when worrisome possibilities about what could happen tried to plague my mind. But it wasn't heart or brain surgery, and knee replacements are becoming almost a fad, it seems. It could have been a lot worse.
Since we decided two months prior to the surgery to go through with it, I had a lot of time to think about what I wanted to do with myself during the nearly 3 hours that would transpire between the before-surgery-good-bye-kiss and watching him get rolled into his hospital room.
I like to do things with my hands, something simple so I can keep the fingers busy while keeping my mind alert and listening to [whatever]. Elizabeth Elliot has taught Christian homemakers to keep their hands busy so they can meditate on Scripture, pray, or listen to a teaching tape, things like that.
I Thessalonians 4:11-12 ... study to be quiet, and to do your own business, and to work with your own hands, as we commanded you; that ye may walk honestly toward them that are without, and that ye may lack nothing.
I Thessalonians 4:11-12 ... study to be quiet, and to do your own business, and to work with your own hands, as we commanded you; that ye may walk honestly toward them that are without, and that ye may lack nothing.
My long-time friends know that I have been sewing since I was a little girl (age 9) and the past nearly 30 years have kept me busy with quilting when I wasn't occupied with cooking, cleaning house, and wiping runny noses. Earlier this year I put away my quilting, supposedly for good, because a serious shoulder injury in 2008 had left a permanent disability that affects my enjoyment of quilting. However, quilting has been my passion for too long and I decided to change my personal expectations of the hobby and get back into it. Beloved's surgery was the catalyst for that.
Before the surgery, I worked very hard on assembling a "snuggle quilt" (45 inches square) for the daughter of one of my nieces. My goal was to get the quilt to the place where I could hand-sew the binding onto the back of the quilt while sitting in the hospital.
When I told Surfer Girl of my plans to sew in the waiting room, she confirmed my thinking with the following: I never schedule an oil-change or road trip unless I have a quilt binding to attach! It's such an efficient use of time! :) I just pack up a large tote bag (like the beach bags you have sent me). I fold up the quilt & place it in the bag first, then I have a little sewing "to go baggie" with my needle, thread and a small pair of scissors.
When I told Surfer Girl of my plans to sew in the waiting room, she confirmed my thinking with the following: I never schedule an oil-change or road trip unless I have a quilt binding to attach! It's such an efficient use of time! :) I just pack up a large tote bag (like the beach bags you have sent me). I fold up the quilt & place it in the bag first, then I have a little sewing "to go baggie" with my needle, thread and a small pair of scissors.
 |
| Quilt blocks have been sewn together; bent safety pins are very helpful for holding the 'quilt sandwich' together in preparation for machine quilting. |
 |
| The step of pinning the quilt densely is time-consuming and worth every single minute! You don't want the top, middle, and bottom layers crawling apart!!! I spread this out on the breakfast bar in my kitchen and watched an entire afternoon of Food Network while doing this tedious chore. As a result I was delightfully entertained and we ate well with the new recipes I saw demonstrated!! |
 |
| The next step was the machine-quilting, which I chose to do on our breakfast table -- again while listening to the Food Network! The smooth surface of the table helped the weight of the quilt to slide along easily as the machine stitched. |
 |
| Grammy Bear stitches straight lines, about 1/4 inch from the seams, in both directions, all over the quilt's surface. Upon close inspection you can see a pink rubber finger on my left hand. It is helpful to wear these "fingers" on any or all of the fingers, or a quilting glove to give the seamstress helpful traction while moving the quilt through the machine. |
 |
| This is a fabulous tip straight from Surfer Girl (my quilting daughter). Use the largest size metal hair barrettes (12 in a package at Walgreens) to hold the binding in place instead of straight pins. Place the clips about 3 inches apart. You can buy these at quilting stores, too. I suspect they cost less at Walgreens. This makes the project much more comfortable to transport. This is how it looked when I took the quilt to the hospital. |
 |
| Beloved models the completed baby quilt the day after his surgery. He was using oxygen when the picture was taken. |
 |
| Ta-da! |
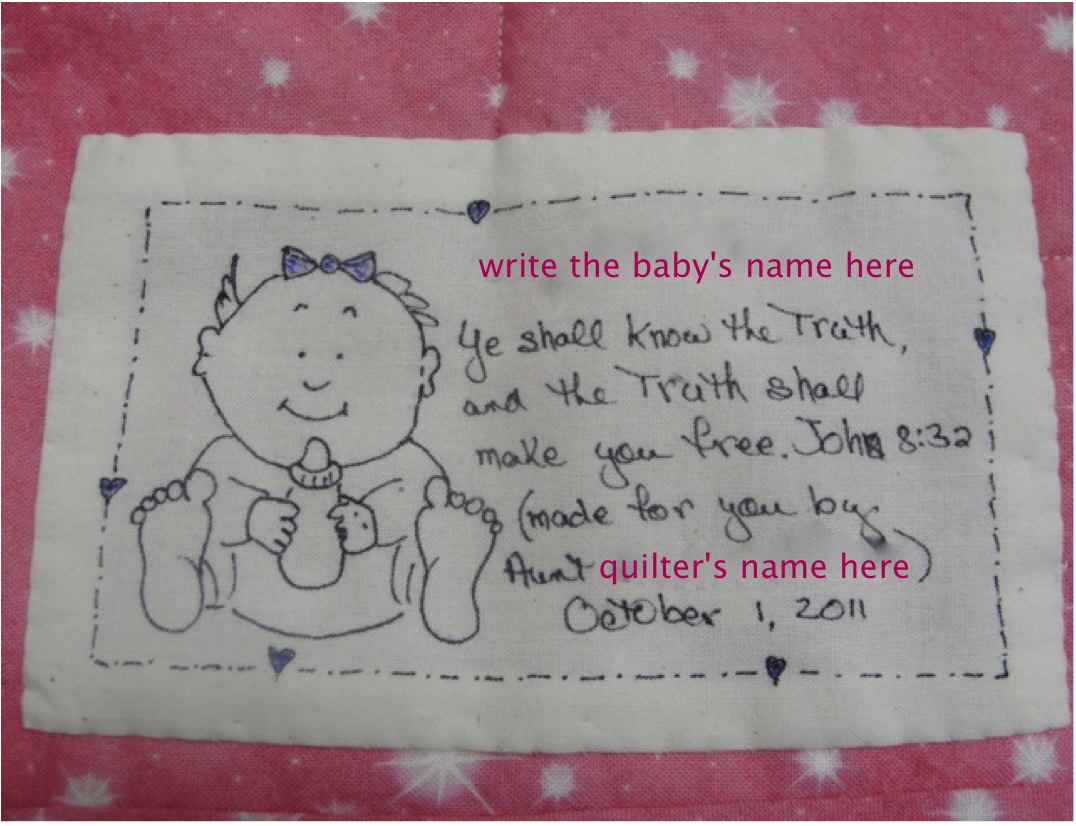 |
| Always label your quilts!!! (this is my soap box issue) I have altered this picture for the sake of my great-niece's privacy. I use the charming illustrations from the quilt label books by Kim Churbuck. With the aid of a light box and a waterproof pen, trace out the design and add any information you want.* ALWAYS put the name of the recipient, your name, and the date. A quilt historian will someday thank you for this - even if you're dead by then! Heat-set the ink and then hand-sew the label onto the back of the quilt. |
The recipient is already enjoying her quilt!
ReplyDelete